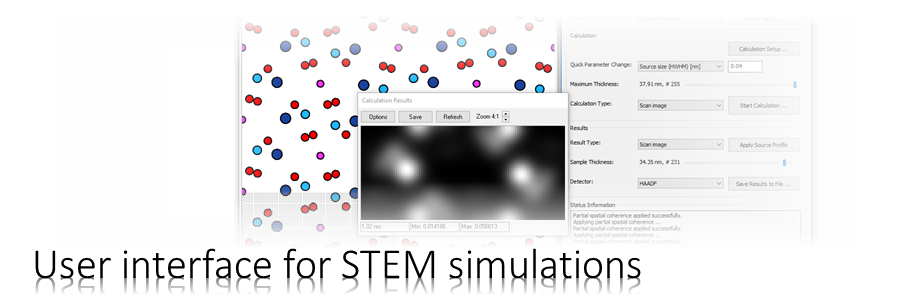
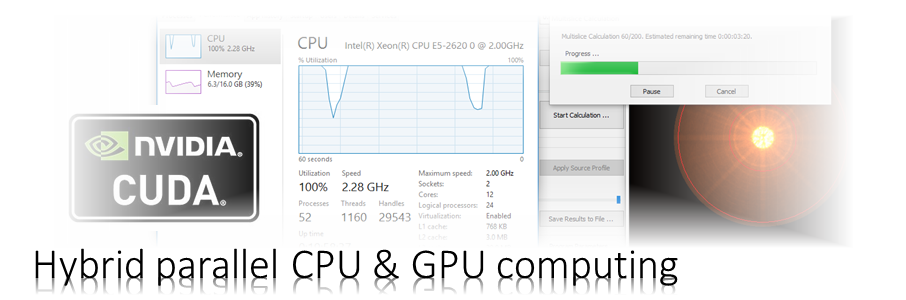

The Dr. Probe graphical user interface (GUI) provides easy access to basic STEM image simulations with direct display of results. Calculations are accelerated by using many CPU threads and your NVIDIA GPU in parallel. The software runs on 64-bit Windows operating systems.
The user interface is build in dialog form with input controls for parameter setup and managing data. Results of simulations are shown in additional data display windows.
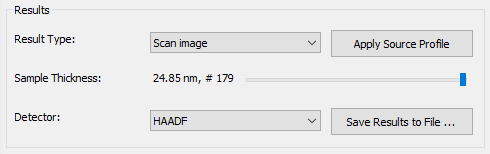
Simulation Results
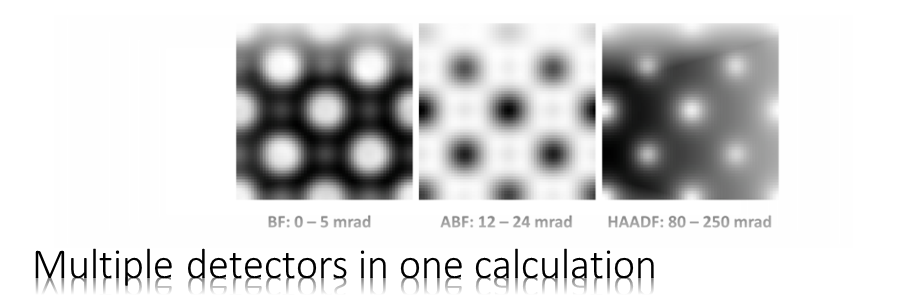
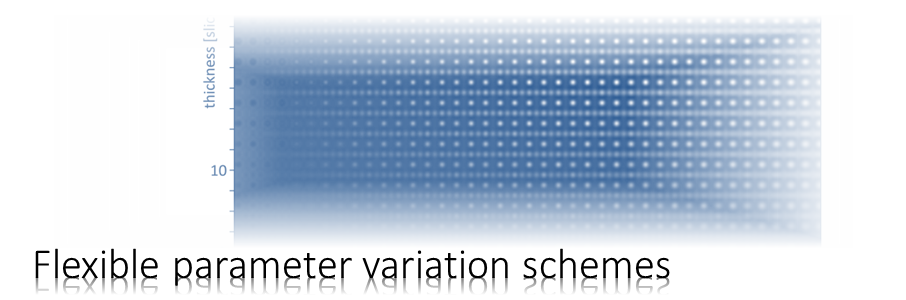
The simulation results can be accessed in the results section. The program preserves one data set for each result type. Images of the selected result type and detector are shown in the data display window to the right of the main dialog. The slider control allows you to browse through results obtained for different sample thicknesses.
When pressing [Apply Source Profile] scan images are convoluted with the effective source distribution function currently chosen in the microscope setup. you may change the size of the source distribution using the Quick Parameter Change options and apply different source sizes after the scan image calculation as often as you want. The convolution is applied to all scan images (all thicknesses and all detectors).
For saving the selected result to files on your hard disk press the button [Save Results to File … ]. An additional dialog will show up and lets you select from a variety of file formats.
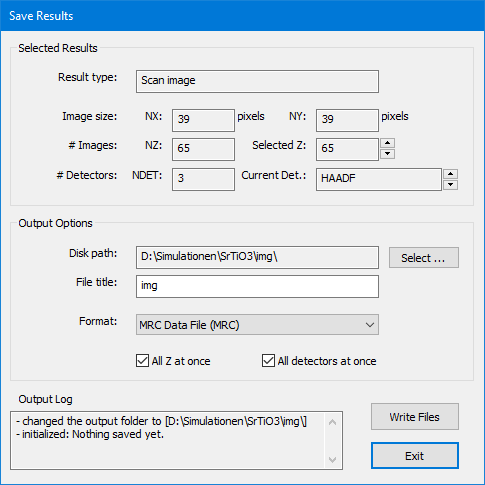
Saving Results
This dialog allows you to save the results of you simulations to files.
The upper part of the dialog informs you about the size and type of the results selected for saving.
The image size denotes the number of horizontal (NX) and vertical (NY) image pixels. The number of images (NZ) refers to images calculated for different sample thicknesses. You may select a specific image (Selected Z) of such a thickness series for the saving to file. In case of scan image results, images may be present for multiple detectors (NDET), and you may select a specific detector (Current Det.) for saving.
The lower part of the dialog allows you specify a common output folder on your system (Disk path) and a file name (File title). The file name extension is determined by the chosen output format.
Two check boxes allow you to switch between the export of the full series or selected image export. With the “All Z at once” option checked, the full thickness series of NZ images is exported, while only the selected image of a thickness series is saved when the option is not checked. Similarly, images of all defined STEM detectors will be saved when checking the option “All detectors at once“, while otherwise only images of the selected detector will be saved.
In case of multiple detector output, the respective detector name is added automatically as a suffix to the file name, e.g. “_BF”, “_ABF”, “_HAADF”, …
The calculation results will be written to data files or images when you press the button labeled [Write Files]. The output log will denote the success of the saving action.
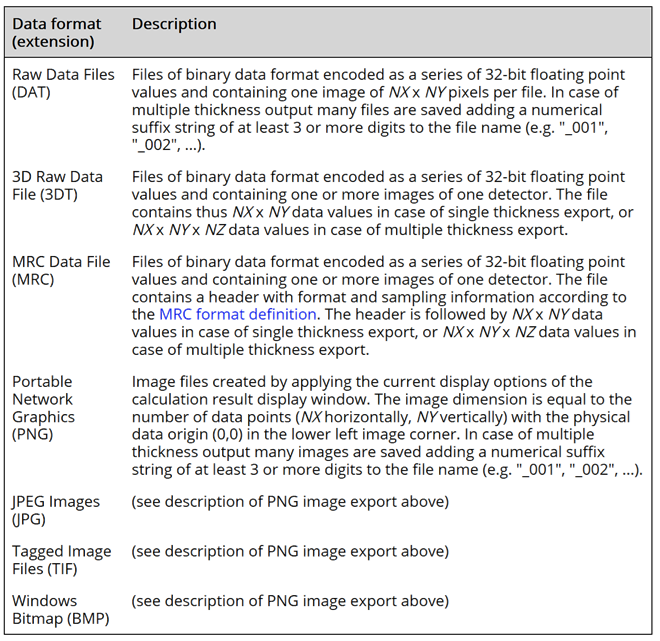
The following table lists supported data and image formats.